Let’s Encrypt free certificates are very useful for Microsoft web servers, MS Dynamics Nav web client access, Exchange and Lync/Skype for business external accesses and so on (better to use it with windows ACME clients for auto prolongation of certificate)
But if you have problems with publishing 80/443 port of your web server (conflict with router admin port, or maybe even server is not in public Internet access and so on, maybe you should configure manually Let’s encrypt SSL for your testing environment)
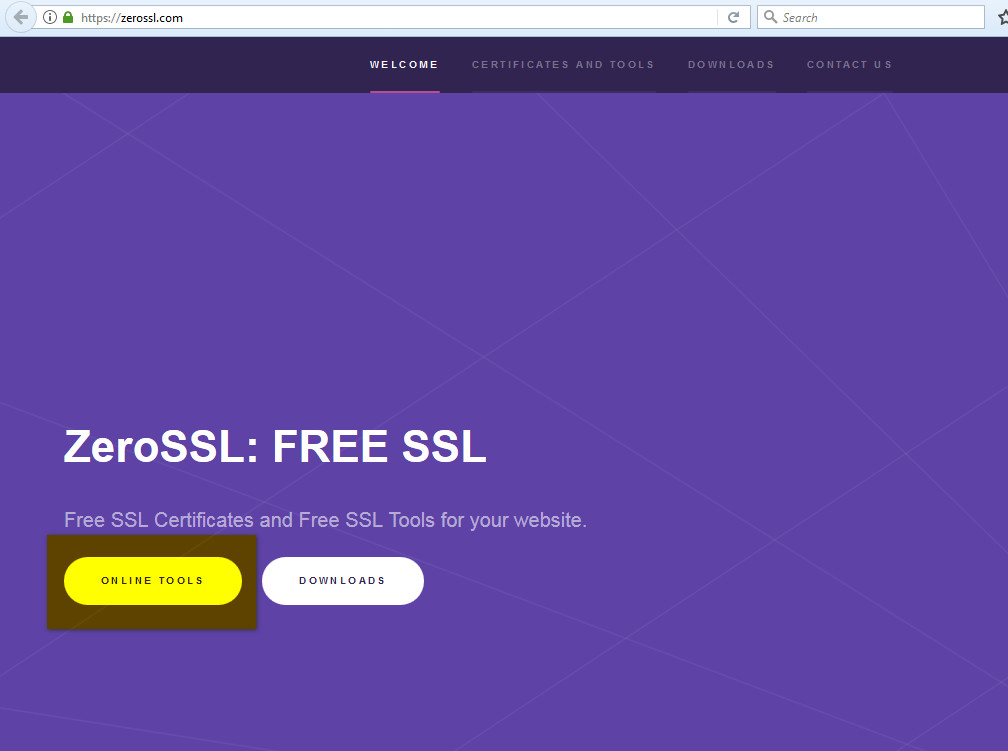
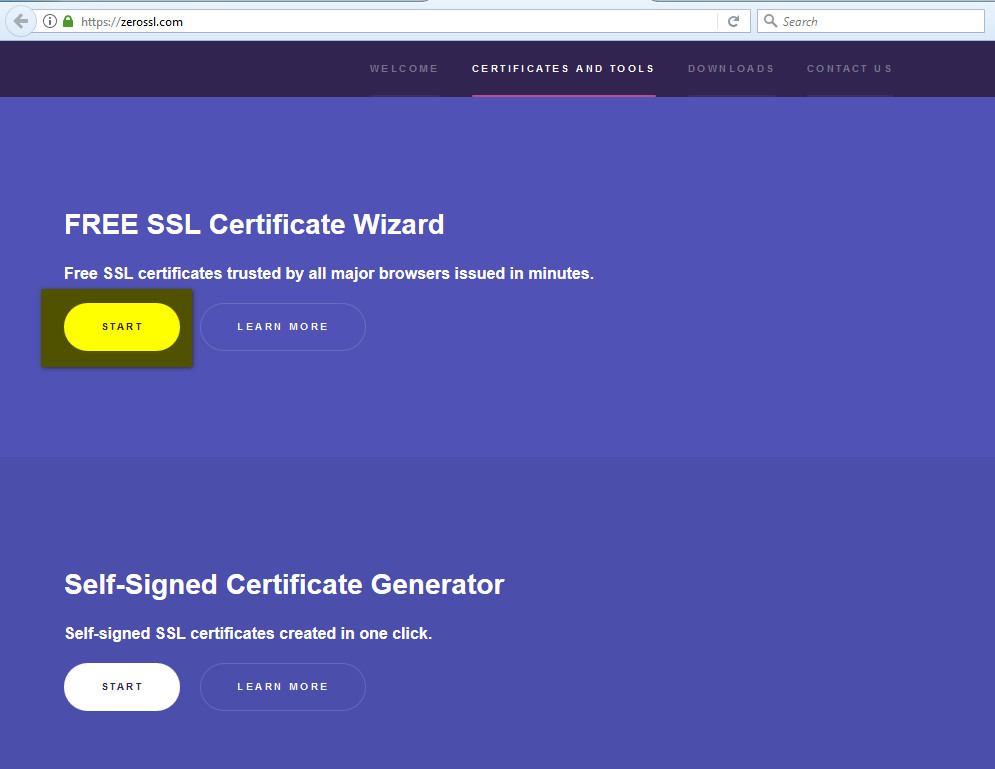
1. go to https://zerossl.com
2.
3.
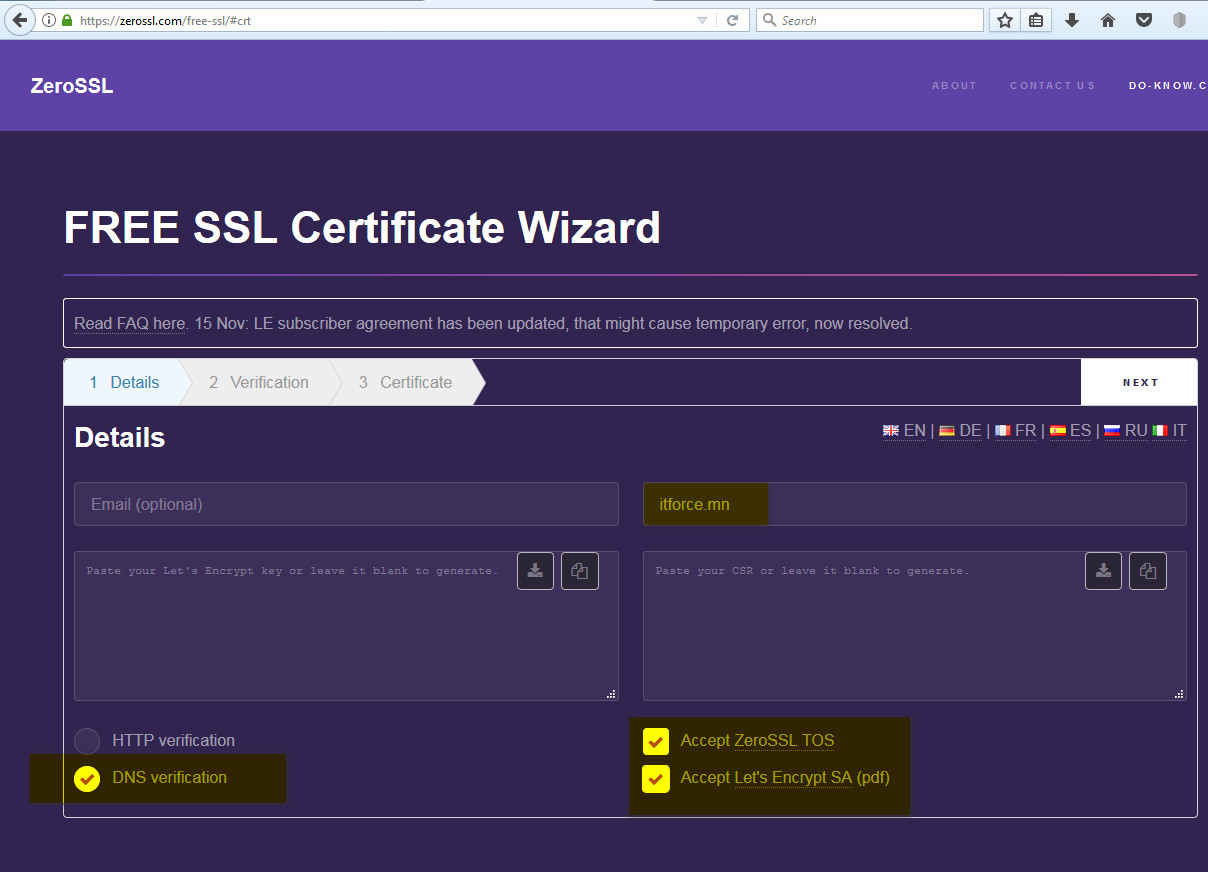
Certbot/ACME clients use “HTTP verification”. We will in this post use standard DNS verification (DV certificate).
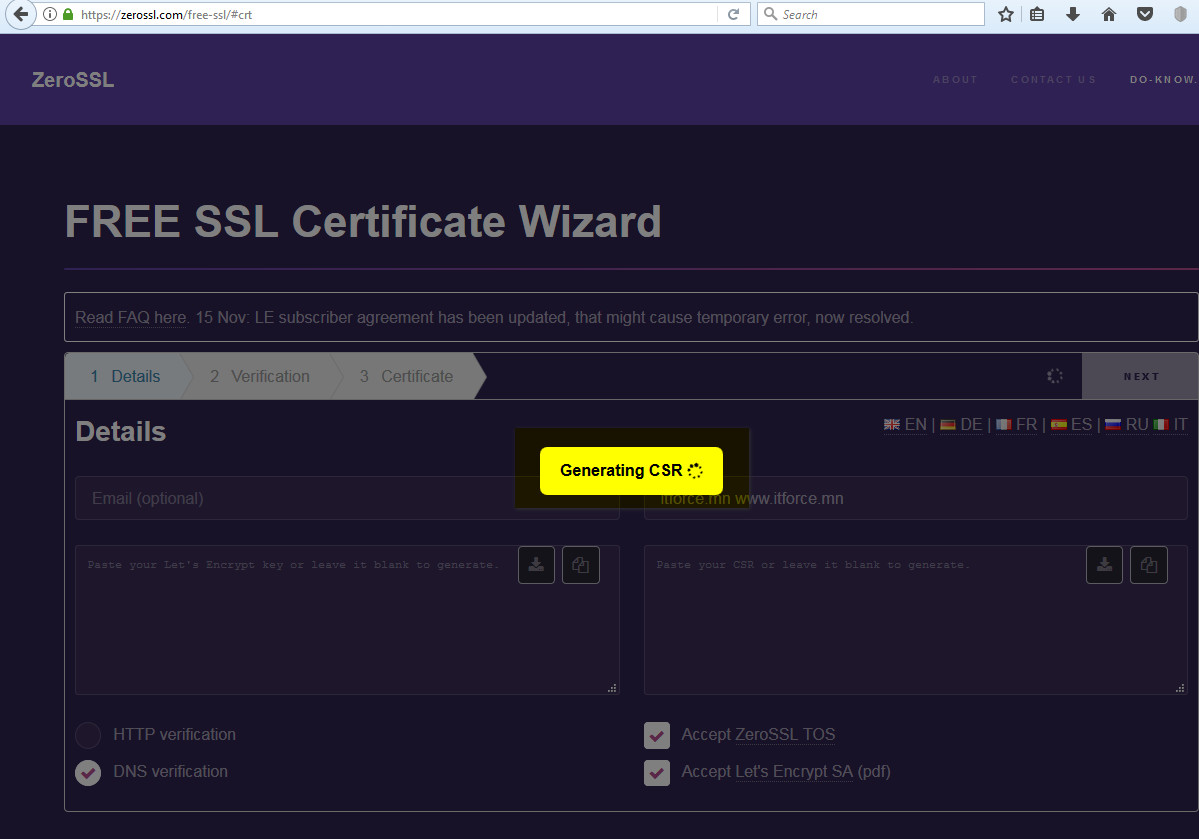
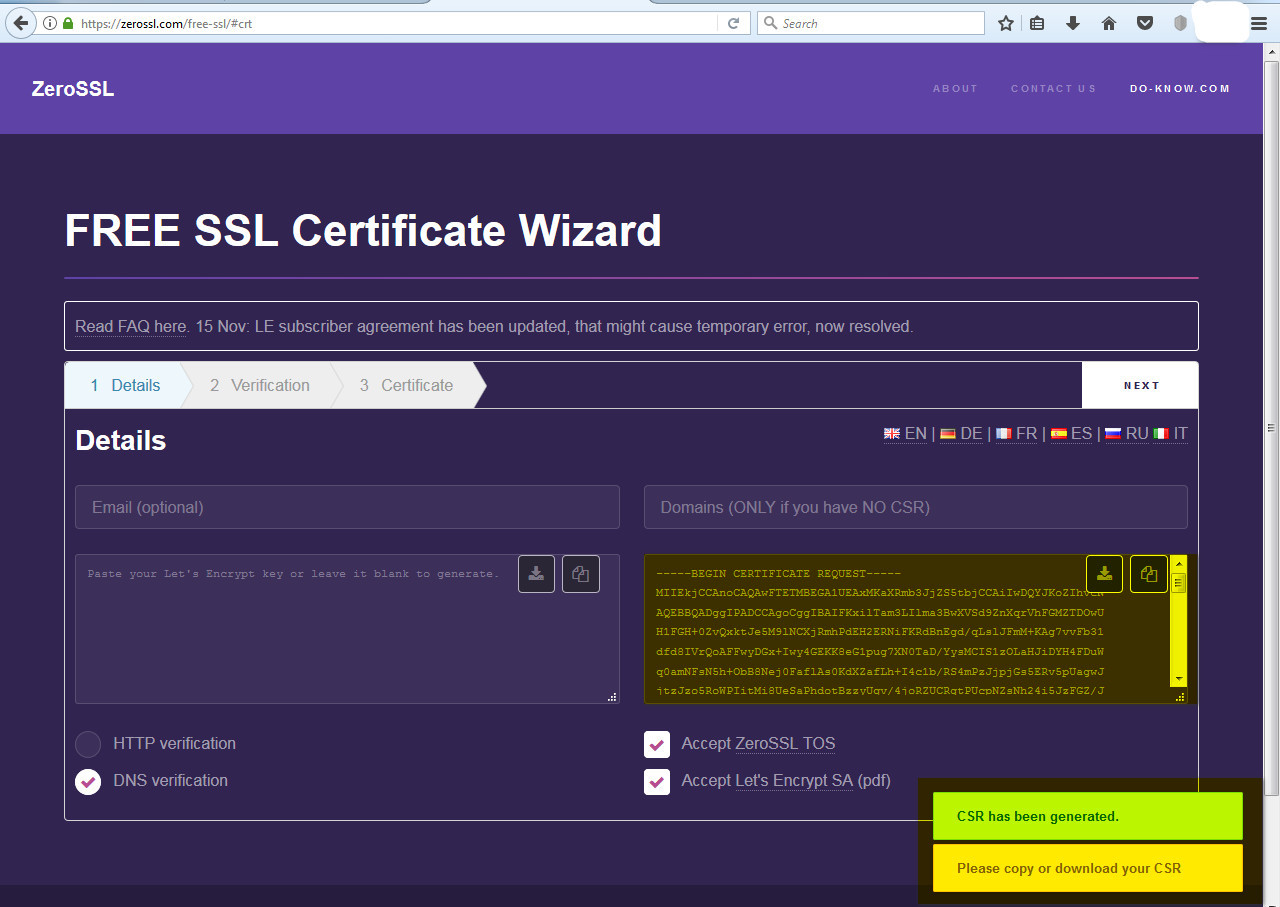
4. Enter your domain name. If you like you can create CSR by openssl, or from IIS Manager and so on, but here we will create from a scratch – so just click next:
5. The result you see below:
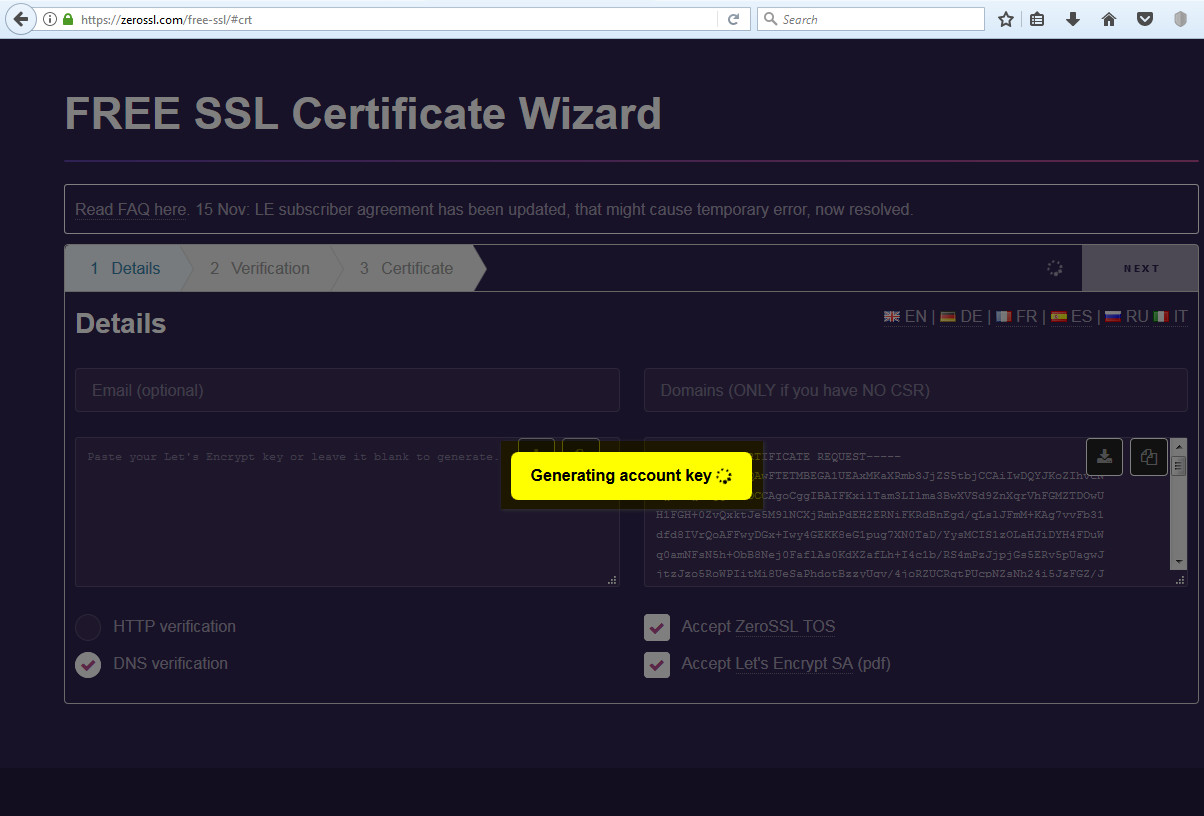
6. Now we generate account key (used later to prolong certificate, like your password for future), again click next:
7. The result:
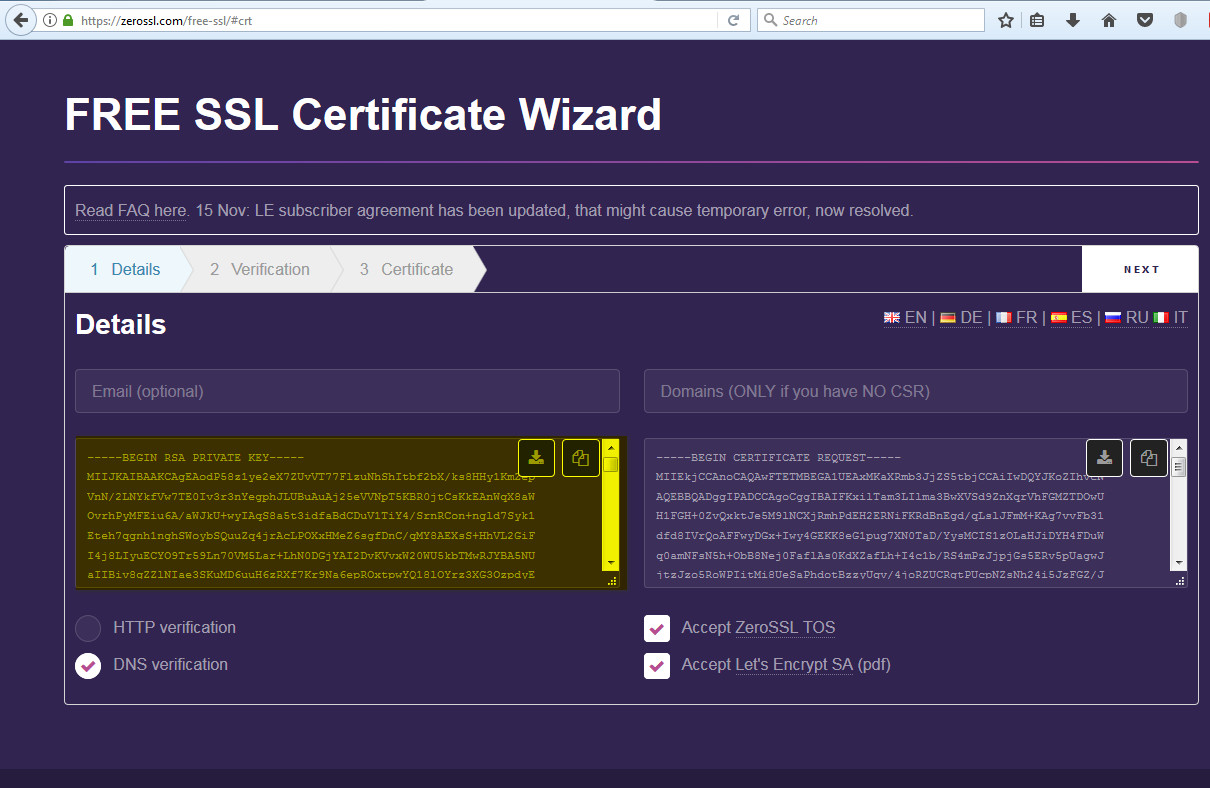
8. download and save in safe place both files. Again click next:
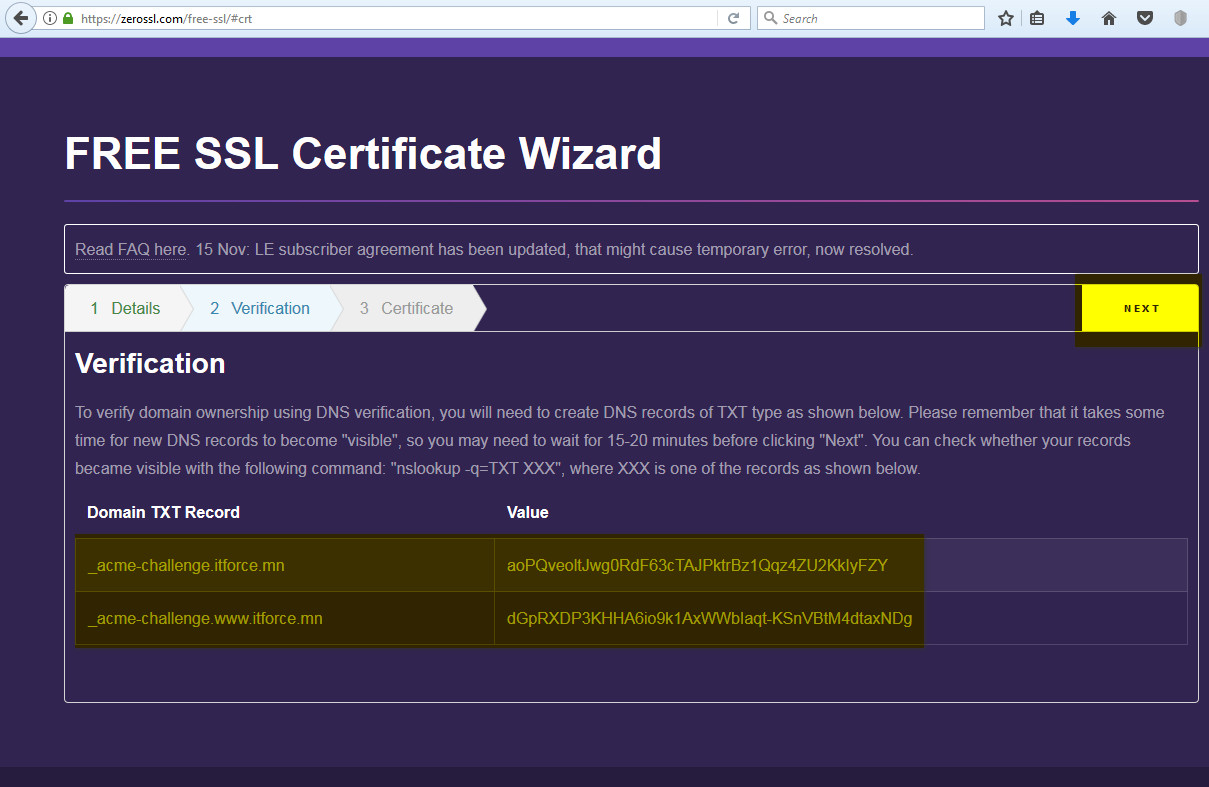
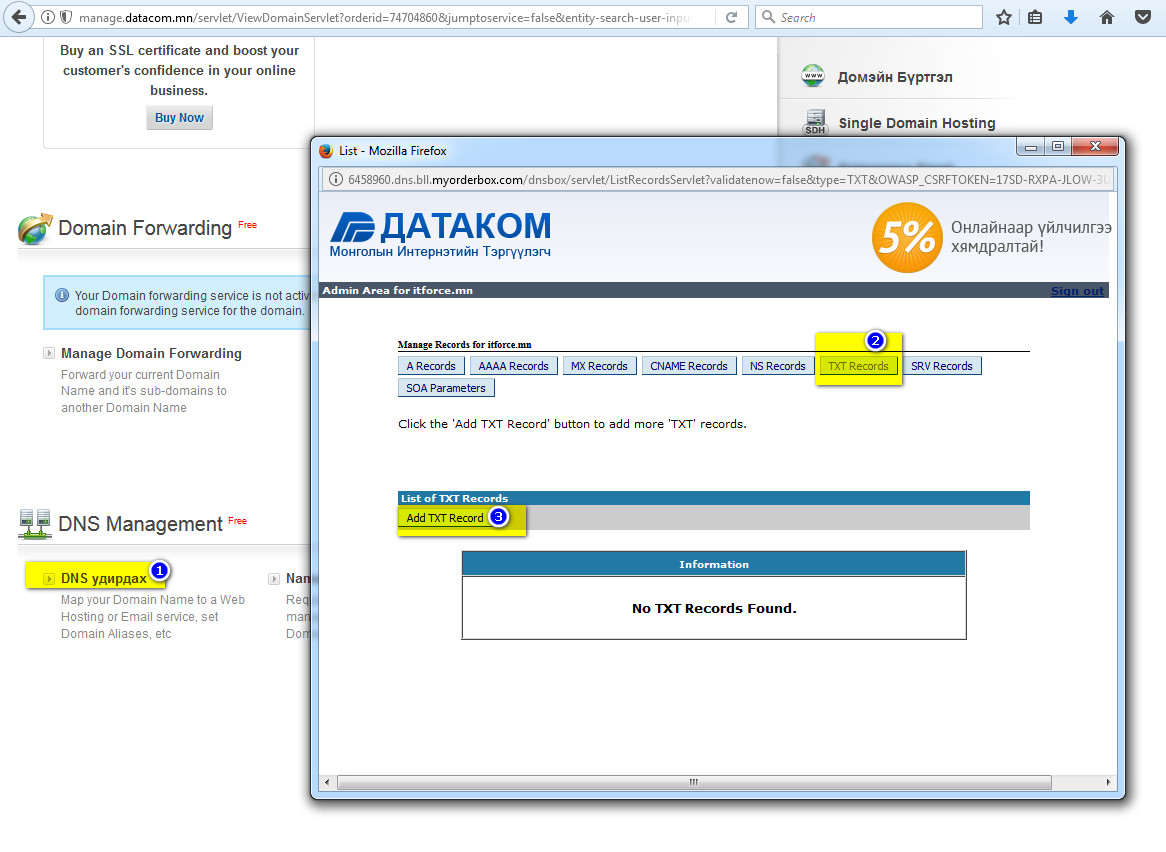
9. Now you should prove that you are owner of the domain creating on your DNS requested TXT records (for Mongolians i am showing on our Datacom registrar):

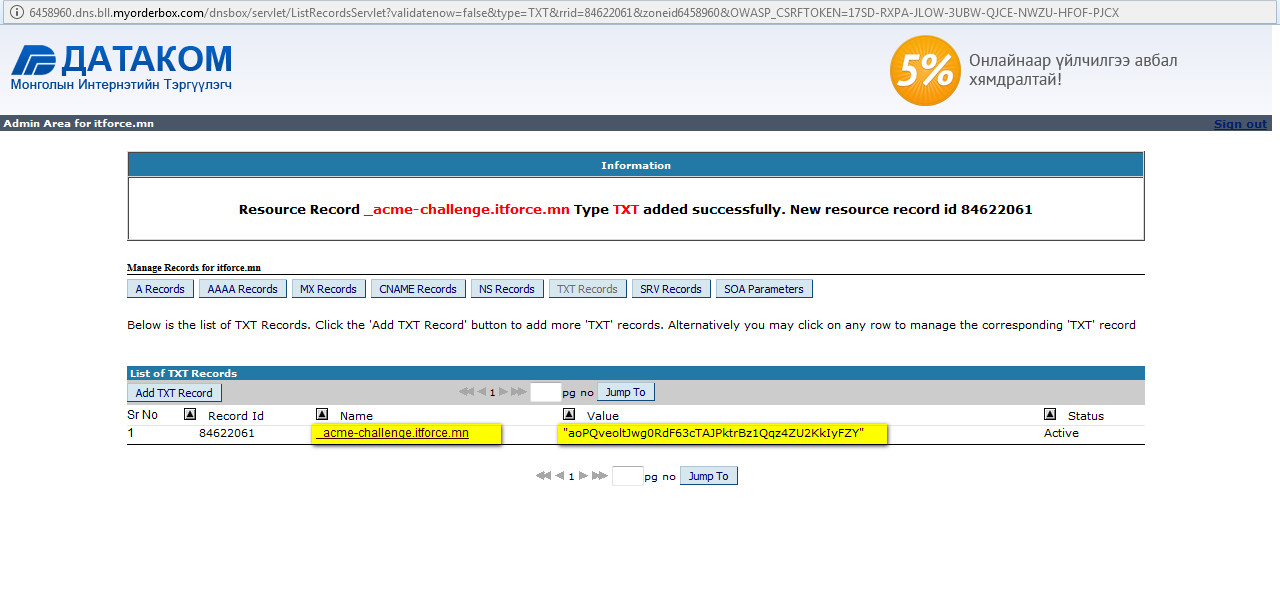
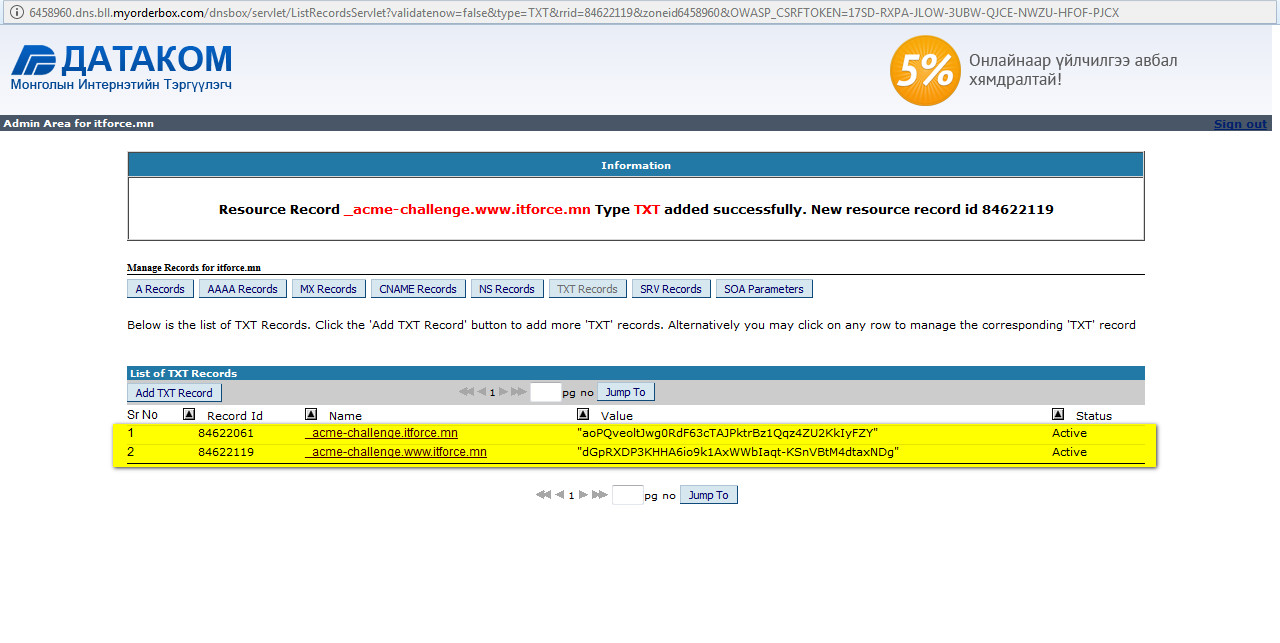
10. if you chosen to include www prefix, repeat above steps to create second TXT record:
11. Now don’t hasten, wait 15-30 minutes before clicking on next button.
12. Next:
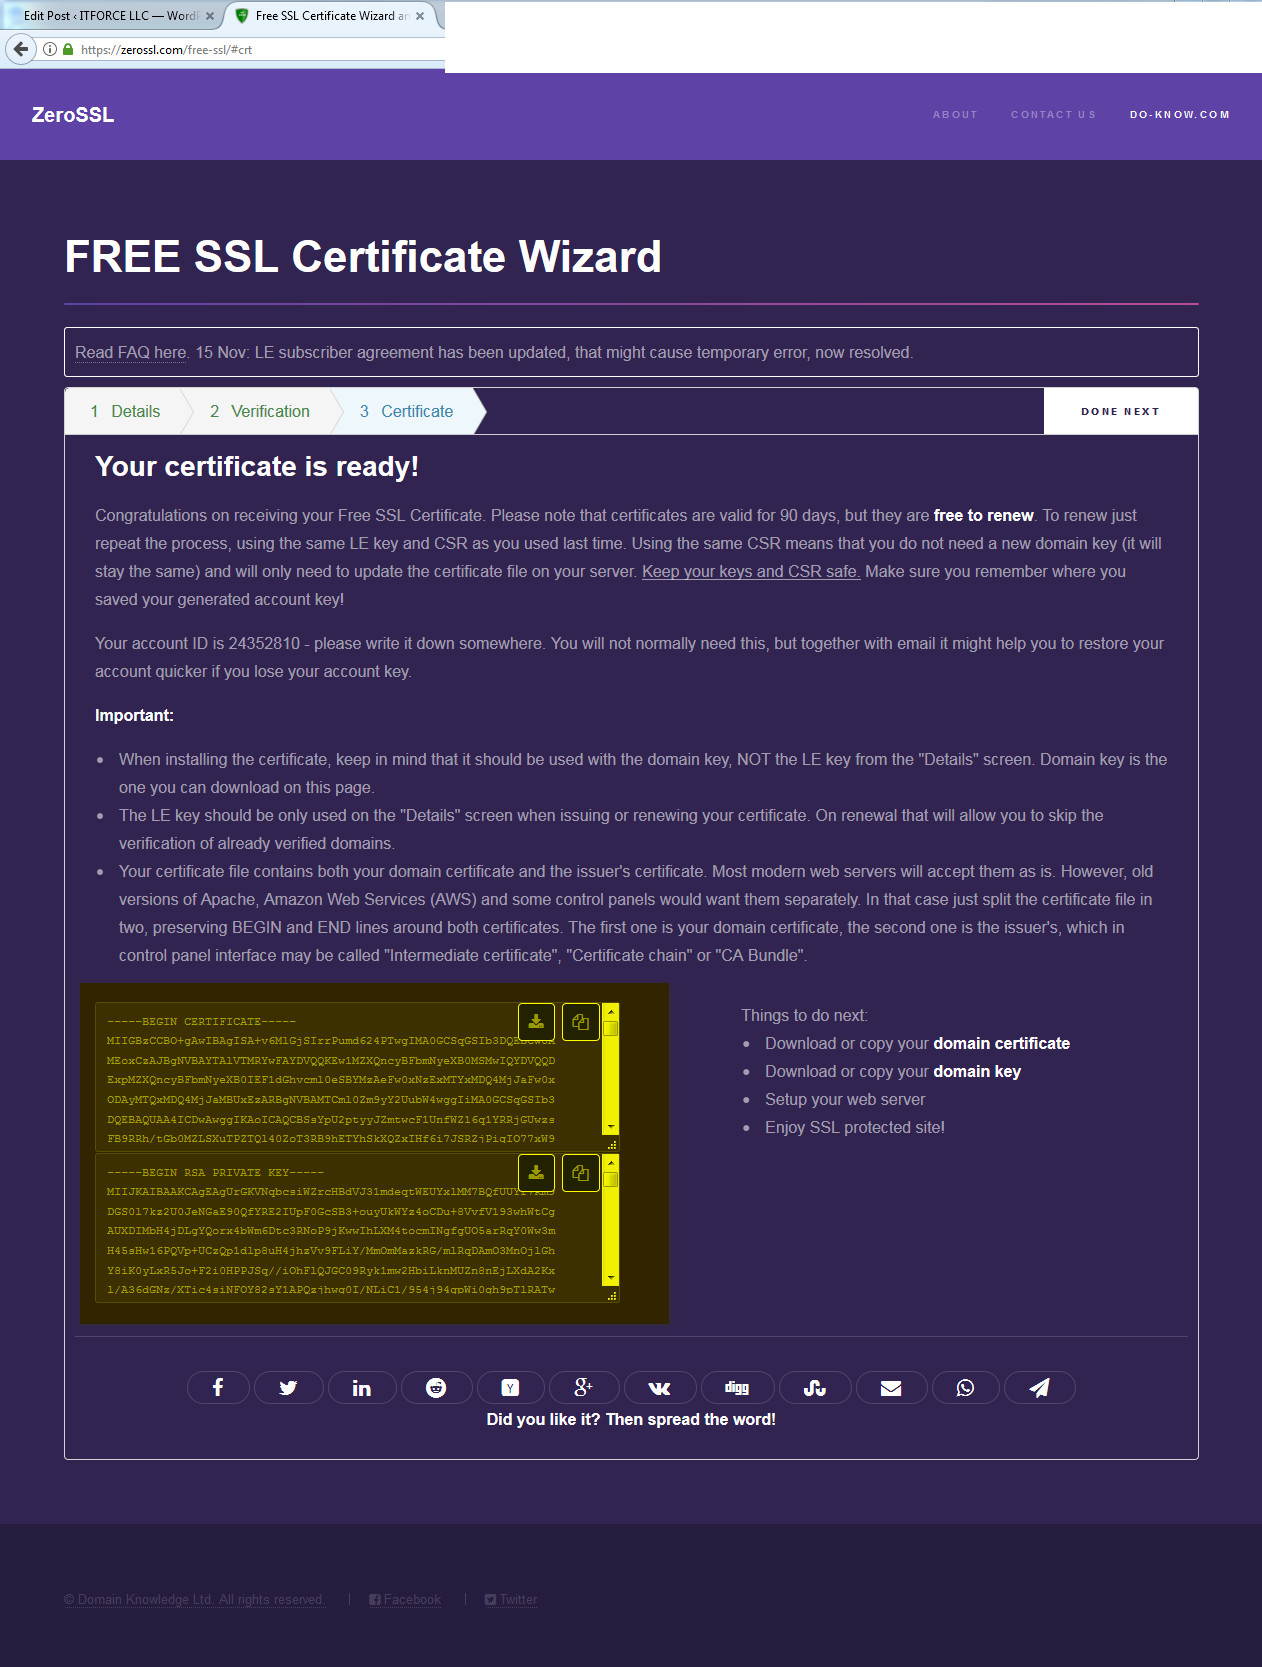
14. download your key and certificate.
15. now we need to install certificate on Microsoft IIS. For this open your IIS Manager and for your web server open “Server Certificates”, “Complete Certificate Request”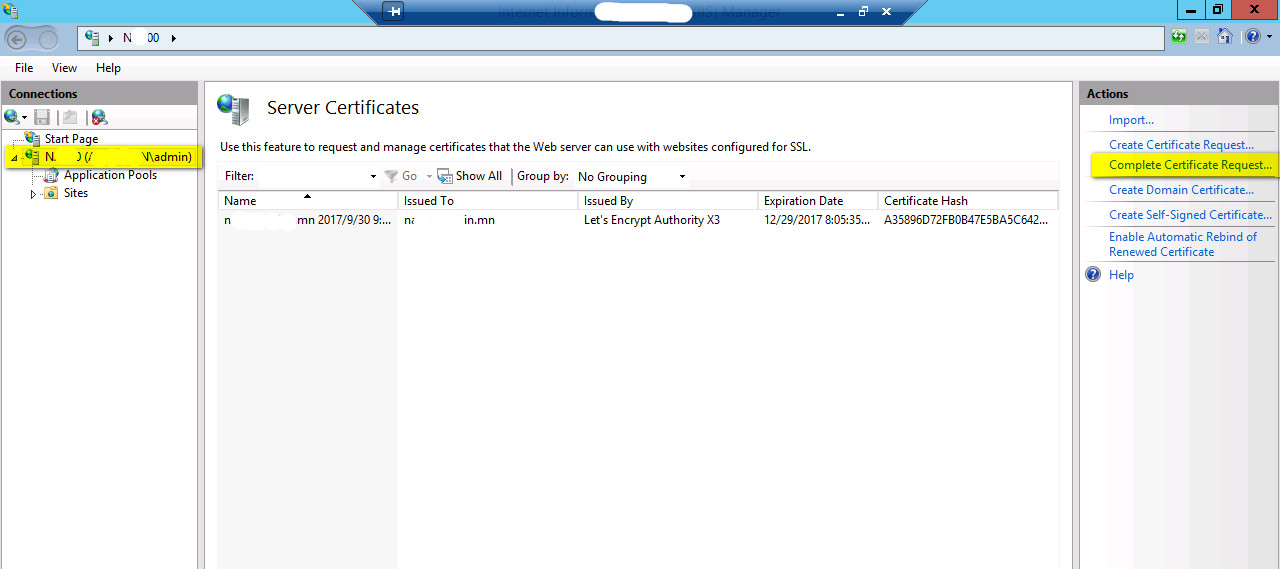
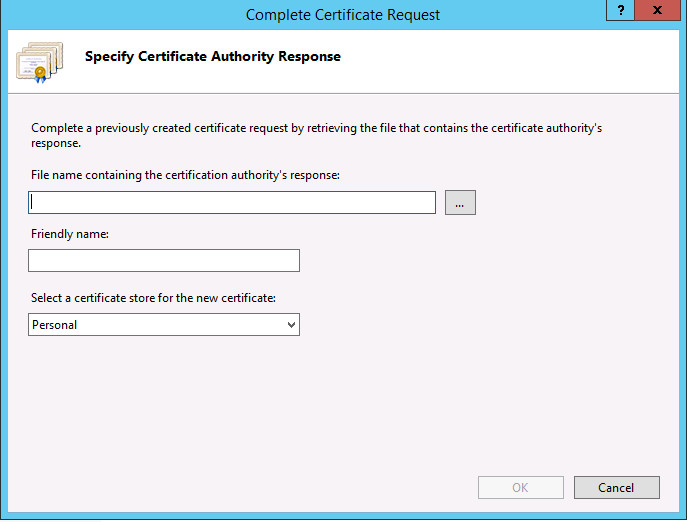
16. choose saved on step 14 file, enter friendly name (i prefer the same as cert subject name)
17. now just bind this certificate to your web server.